
Raspberry Pi Home Server – Hardware requirements
The Raspberry Pi has revolutionized the world of single-board computers, captivating tech enthusiasts, hobbyists, and educators globally. This compact and affordable device opens up a world of possibilities for both novices and seasoned developers alike.
The 4GB Raspberry Pi 4/5 Model B stands out as a versatile and powerful option. Its key features include:
- Quad-core ARM Cortex-A72 64-bit processor running at 1.8GHz
- 4GB of LPDDR4-3200 SDRAM
- Dual-band 802.11ac Wi-Fi and Bluetooth 5.0
- Gigabit Ethernet port
- Two USB 3.0 and two USB 2.0 ports
- Dual micro-HDMI ports supporting 4K resolution at 60Hz
This model offers robust performance for a wide range of applications, including:
- IoT projects
- Home automation systems
- Media centers
- Small-scale servers
The 4GB RAM allows for smooth multitasking and handling of resource-intensive applications. It strikes an excellent balance between performance and affordability, making it suitable for most projects. If you can afford a better model, I would advise you to get it. The 8GB/16GB models have recently been released.
For our Media Server Project you might need
- A cool case
- PSU
- SD card or Cards
- Ethernet Switch
- If you use the Pi in headless mode (Without monitor and keyboard) you will require another LAPTOP/Desktop to remote into the PI.
2. SD Cards
When it comes to using the Raspberry Pi 4, the choice of SD card is a crucial consideration. SD cards serve as the primary storage medium for the operating system, applications, and data. The Raspberry Pi supports a variety of SD card options.
The speed and performance of the SD card directly impact the overall responsiveness and functionality of the Raspberry Pi. It is recommended to opt for high-quality, reliable SD cards with fast read and write speeds to ensure smooth operation. Class 10 or UHS-I cards are typically preferred for optimal performance.

Additionally, considering the storage capacity needed for your specific project is important. SD cards are available in various capacities ranging from a few gigabytes to lots. It is advisable to choose an SD card with sufficient storage space to accommodate the operating system, applications, and any additional data files. By selecting a compatible and reliable SD card, you can ensure reliable performance and efficient storage management for your Raspberry Pi Projects. Personally I never have had any issues with 32GB SD cards. They are reliable, and they are affordable.
3. Ethernet Port
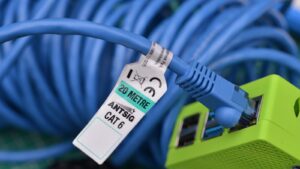 |  |
The Ethernet switch needs to be connected to the main router to one of its ports, which means you will have to run an Ethernet cable from the switch to an available port on the router. When using media applications on the Raspberry Pi, utilizing the Ethernet port can greatly enhance your experience.
The Ethernet port provides a reliable and stable wired connection to your network, ensuring smooth and uninterrupted streaming of media content. Compared to wireless connections, Ethernet offers higher bandwidth and lower latency, resulting in faster data transfer rates and reduced buffering times.
This is particularly beneficial when streaming high-definition videos. Additionally, the Ethernet connection is less susceptible to interference from other devices or physical barriers, providing a more consistent and reliable network connection.
By connecting your Raspberry Pi to your network via the Ethernet port, you can enjoy seamless media playback, minimized lag, and a more immersive media experience overall even when the Pi is used for hosting websites.
When configuring the Ethernet port on the Raspberry Pi, you have the option to either assign a static IP address or reserve a DHCP address for the device. Using reserved DHCP allows you to have the benefits of a fixed IP address without the need for manual configuration. With reserved DHCP, you can specify a specific IP address to be assigned to the Raspberry Pi based on its MAC address.
This ensures that the Pi always receives the same IP address whenever it connects to the network, providing a consistent and predictable network identity. Reserved DHCP is particularly useful in scenarios where you want the convenience of a fixed IP but also want to manage IP assignments through your DHCP server.
By reserving an IP address for the Raspberry Pi in the DHCP server’s configuration, you can enjoy the benefits of a stable network connection while still leveraging the flexibility and central management capabilities of DHCP. This approach offers a convenient middle ground between a fully static IP configuration and relying solely on dynamic IP assignment. See below.
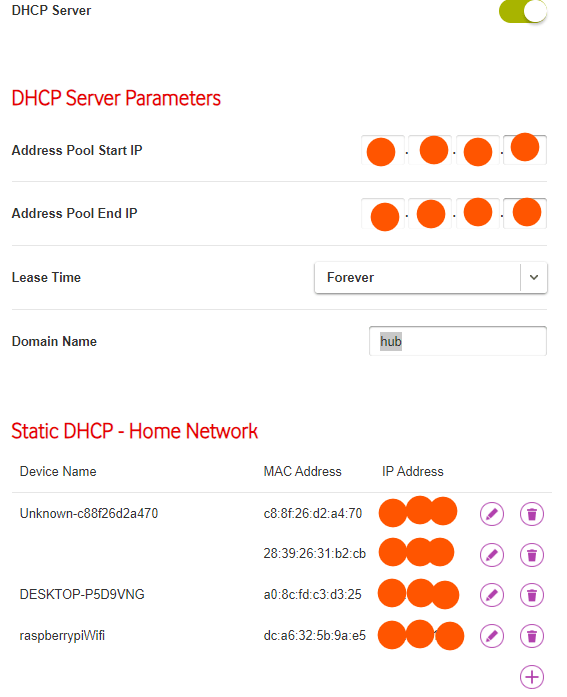
In most routers, the DHCP (Dynamic Host Configuration Protocol) pool is enabled by default, which means that devices connecting to the network are assigned dynamic IP addresses. However, if you want to assign a specific IP address to a device, such as your Raspberry Pi, you can make it permanent by associating it with the MAC address of the device’s network interface card.
The MAC address is a unique identifier assigned to each network interface, and by adding this association in your router’s settings, the IP address will be reserved for the Raspberry Pi. See the screenshot above for an example.
This ensures that every time the Raspberry Pi connects to the network, it will always receive the same IP address, providing a consistent network identity and simplifying access to the device. By taking advantage of the DHCP reservation feature in your router, you can easily allocate a permanent IP address to your Raspberry Pi without the need for manual IP configuration on the device itself.
 | |
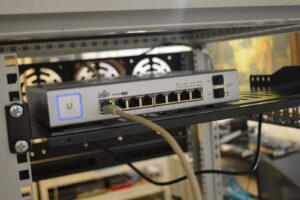
Most home routers typically come equipped with one or two Ethernet ports, which may not be sufficient if you have multiple devices that require a wired connection, such as a NAS for media streaming. Since I am trying to keep the cost down and use what the Telco provided, I opted for a small 4-port 1Gbps switch which can be a valuable addition to your network setup.
A switch acts as a central hub, expanding the number of available Ethernet ports on your router. With a switch, you can connect multiple devices, including your Raspberry Pi, to your network using Ethernet cables, ensuring each device receives a reliable and dedicated connection.
The 1Gbps speed of the switch allows for fast and efficient data transfer between devices, minimizing latency and maintaining optimal performance. By adding a switch to your network, you can easily overcome the limitations of the router’s built-in Ethernet ports and create a robust and scalable wired network infrastructure to support your media streaming needs.
Nowadays these switches also relatively inexpensive and makes for a quick and easy fix for a small setup. Depending on the amount of NAS devices and other services that you are hosting you might opt for a low cost 8 port switch. For my needs, the 4-port switch was sufficient.
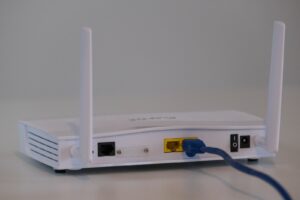
It is important to note that the small router provided by your internet service provider (often referred to as a Telco router) may have limited performance capabilities for many devices. These routers are typically designed to meet basic networking needs and may not offer advanced features or provide optimal performance for demanding tasks.
If you require a more robust and efficient network setup, especially because you have other home devices (Door Sensors, Intercoms, Alarm systems, CCTV systems, Access control systems, IOT Devices ect), it is recommended to consider upgrading to a higher-performance router or using additional networking equipment such as switches or access points to enhance your network infrastructure, and implement security features.